How to block Web Pages with SecureKids 24/09/2015
We have already talked about how does a parental control works and explained some things this kind of tools can offer, but today we are going to learn in detail one of the most interesting features in SecureKids, Web Control.
Yes, one of the most interesting, because in this section you can manage a lot of changes and different configurations, as we will explain further down. You can create Web whitelists, select some Web filters or select some of the navigation security levels your child’s device has.
LET’S GET STARTED WITH THE WEB FILTERS!
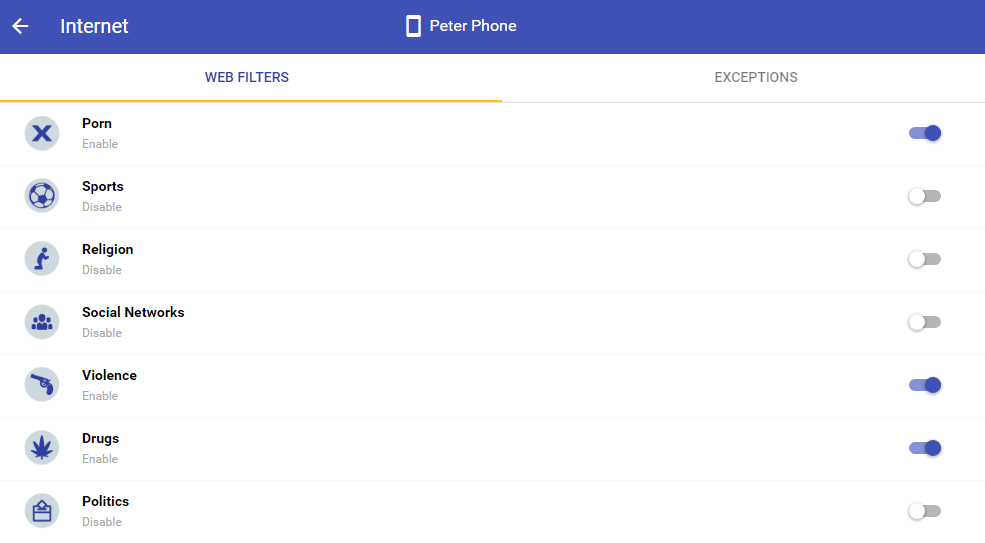
When you access the web control, the first thing that appears are the web filters, composed of 7 different categories, which you can activate to block the webs with those type of content.
The filter list will appear with a switch for each one, and under the title there is a tag indicating if it’s activated or not. Also, if the button is blue the filter is activated.
- Blue Switch: Filter X activated. The contents are blocked.
- Gray Switch: Filter X deactivated. The content can be accessed.

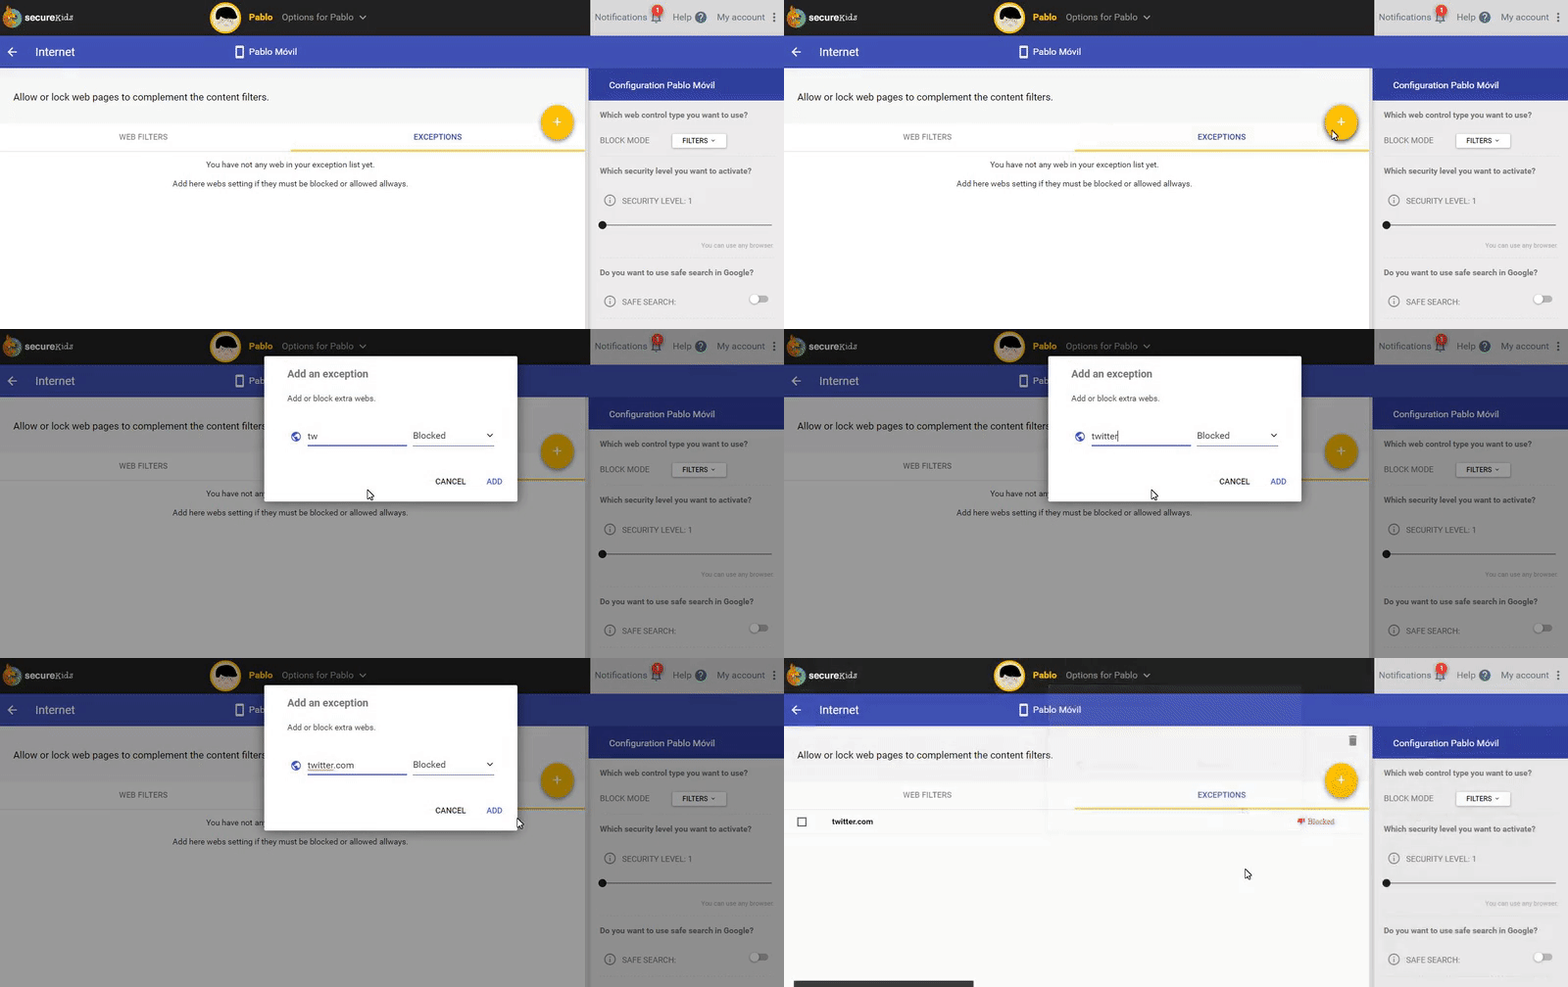
But you can do even more with the filters, we will explain now how to create exceptions to them. If you don’t want to allow your child access to a filter category but on the other hand, there is a web of that category that you consider safe for your children.
There are two types of exceptions, ALLOWED exceptions and BLOCKED exceptions, the first ones works as described above, and the former ones let you to deny access to the web page you insert.
Let’s make an example, i don’t want my son to enter in Social Networks, but i don’t care if he uses twitter from time to time, so i activate the Social Networks Filter, and then i’ll add an ALLOWED exception to twitter.com (you can see it cleaner in the next image).

WHITE LISTS
Another feature of SecureKids is the ability to create white lists, with which parents can protect their children from the dangers of the internet, restricting every web except the web pages that can be accessed from the device.
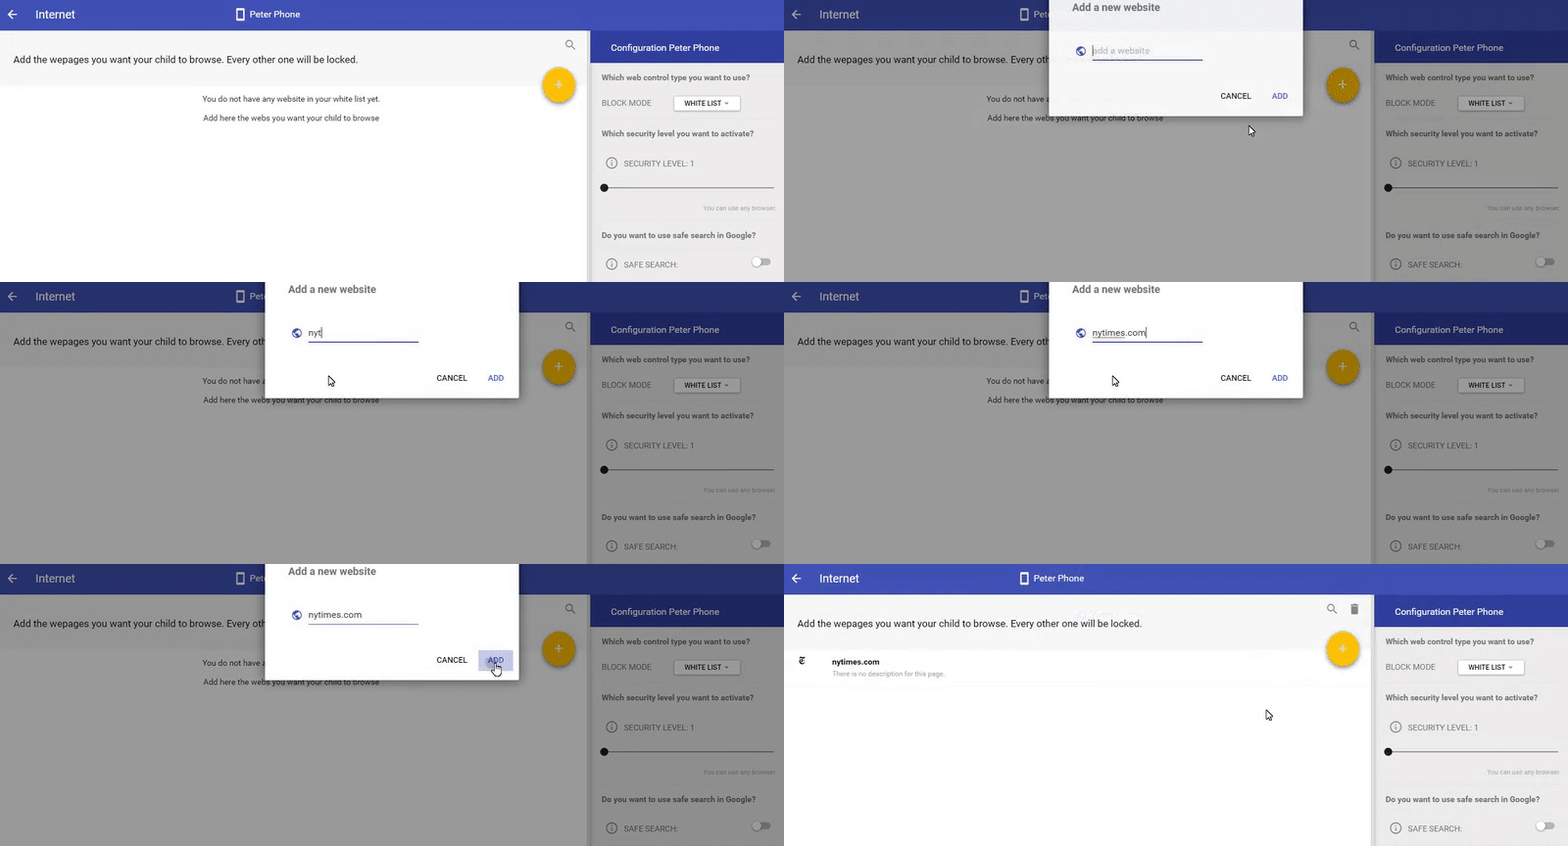
To determine the whitelist, you must go to the configuration area to the right side of the screen, where it says “BLOCK MODE” and next to it says “FILTERS” but if you click on this dropbox, another option “WHITE LIST” will appear. Note that you can only have a block mode, ie if you have some active filters and change to white lists, the filters settings will disappear.
With the White List you can add every page you want to allow your children to access from their mobile devices, but be careful, as any other web page will be blocked without exception. This mode is useful when your children likes to navigate through a few of selected Webpages and you consider them appropriate for him.
Let’s make an example out of this, in my case i don’t care my son reads the newspaper online, so i will add that page to his whitelist. To do so i must enter white lists and click the plus yellow button on the right, then i write the New York Times webpage (like in the image down below).

Once this web is in the white list, the minor’s device can navigate through it, but won’t be able to access to any other web unless you add them to the list.
EXTRA SECURITY
There are some options to increase the web security that are commons to whitelists and filters. They are located on the left menu, under the device and module information.
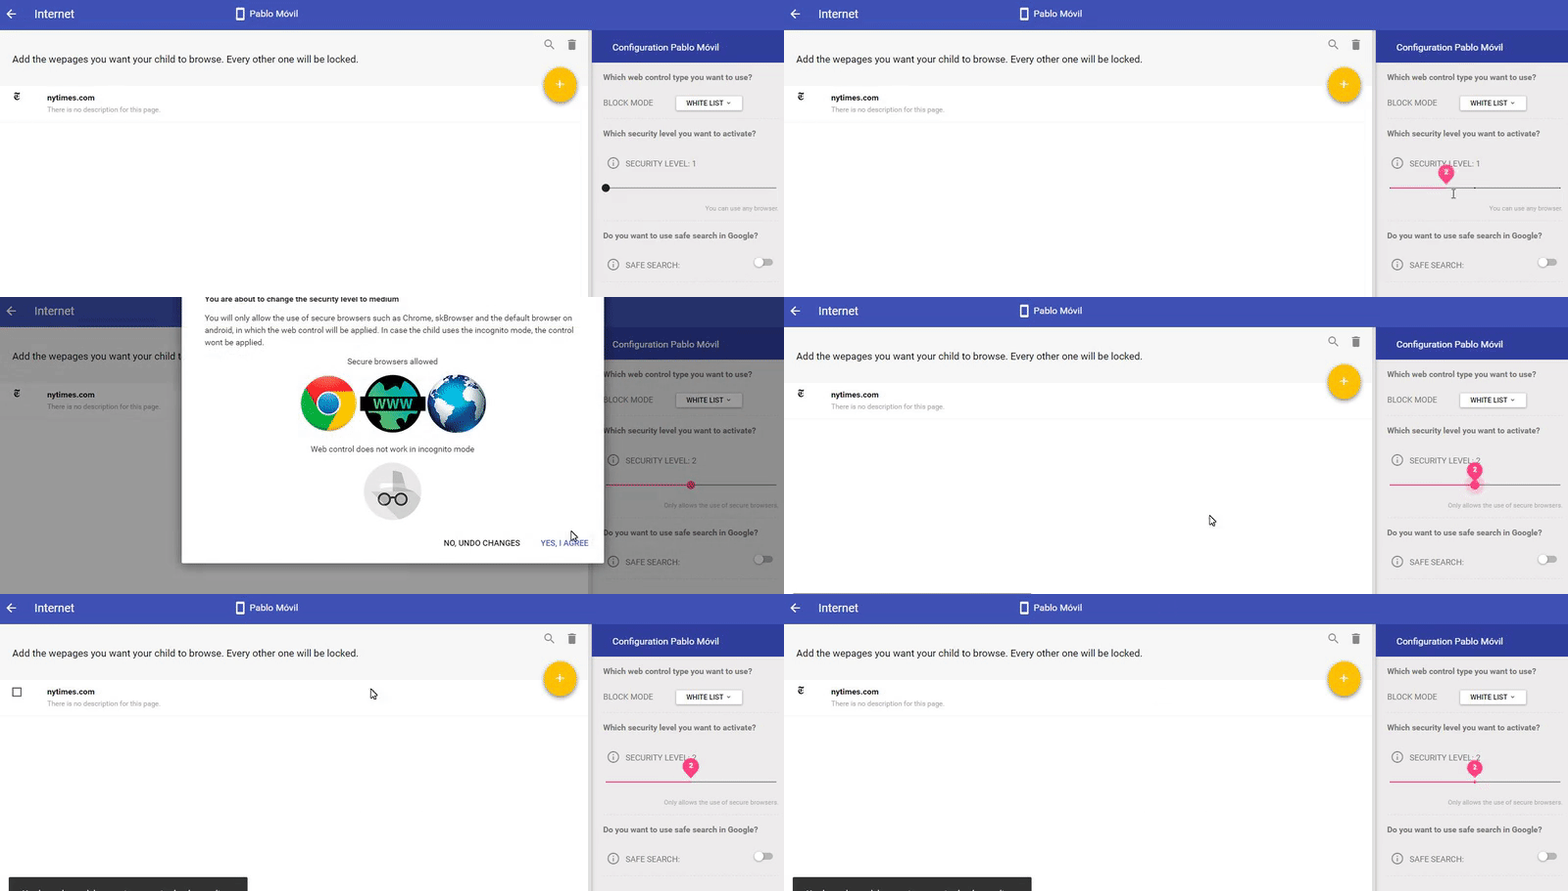
One of the features SecureKids has to ease the web control of the mobile devices are the different Security Levels our tool offers. These levels start in level 1, the default configuration of the device, until level 3, each of them safer than the previous:
- At level 1 every browser in the device will be allowed.
- At level 2 the browsers allowed are only Google Chrome, Android Browser (the default browser of the device) and SK Browser, the secure Browser that comes along with SecureKids.
- Lastly, at level 3, only our SK Browser is allowed, as it’s the most secure if you want to apply correctly the SecureKids Web configuration.
To change the security level you only have to move the switch from level 1 to the one you want, and a message explaining the details of the new level, allowing you to undo the change or confirm it.

At last, in this section you can activate Safe Search, and when a Google is used for searching in this mode it will ignore every result related to unappropriated or unapropiated content for the minors. You just have to click on the switch and confirm the activation.
¡WE END AT LAST!
Wow, we have more than 750 words and i hope they are not too much, but if this has been of help to learn how to use this wonderful parental control tool i’m more than pleased. If you still don’t know what is SecureKids come and DISCOVER it!
If you have any question or suggestion you can comment just below.


